Navigating the Default Options in WordPress
You’ll need to be logged in to the back end of your WordPress website for this.
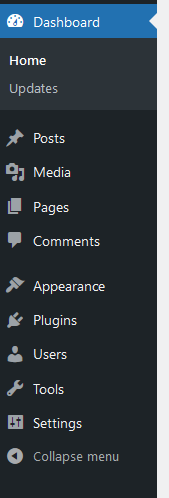
Notice the sidebar to the left which contains all of the options you’ll need. On a WordPress site without any extra plugins and themes, this will show (and this SOM will go through):
- Dashboard
- Posts
- Media
- Pages
- Comments
- Appearance
- Plugins
- Users
- Tools
- Settings
Dashboard
When you first log in, you will see the dashboard. You likely won’t need to use this, but it does show you things about your site and WordPress news at a glance.
In the sub category that comes up underneath Dashboard when you click on it, are Updates. This will show you any WordPress updates (do not do this if you don’t have a backup of your website files), plugin, theme and translation updates. Please check with the account manager or studio team before going ahead with these.

Posts
In here, you can create and view posts for your website’s posts. See the ‘Adding Posts in WordPress’ and ‘Creating a blog in WordPress’ SOMs for using this.
In the posts sub category, you will see: add new, categories, tags. There are SOMs for using each of these.
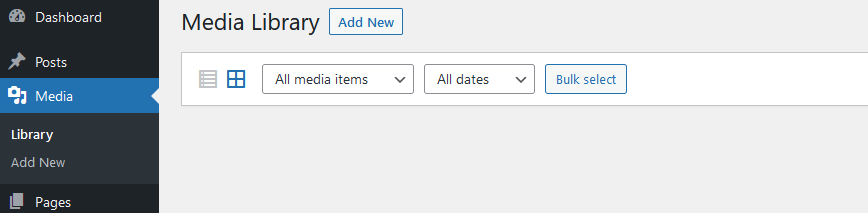
Media
In here is a store of all of your media files (pictures, images, documents etc.).
To add new media, click ‘add new’. Drag and drop your file in to the box or click select files and choose your file. Your file will then appear in the grid list of all media. You can bulk select media items using the drop down arrows on the white pane to perform an action on multiple files. You can also search media items by their name. If you click on a file that you have uploaded, you will see its details. The URL is often useful for linking up a file. The title should be appropriately named. You can add a caption if needed. The alt text should briefly describe what is in the image, as this will appear should the website/browser fail to show the image.
Pages
This is where you will find a list of all the pages on your site.
You can see the title, type of page if it’s set, author, comments and date. You
can also refine these pages into categories of All, Drafted, Published, and Bin.
If you hover over the title of a page, you will see all the options you have. The one you will use most often is Edit. This opens up the page so you can change the content. More information on using this can be found in the ‘Adding Pages in WordPress’ SOM.

Quick Edit can let you change the title, slug, date, author, password/privacy settings, parent category, order, template and status. The most common tools you will likely use is the title, slug, parent and status. If you make an edit, be sure to click Update.

The Bin button will send the page into the bin, if you do not wish to use it anymore.
The View button will send you directly to the front end page to see what the page looks like on your website.
With some plugins, you may see a Clone button. This will duplicate your page.
Next to the title of the Pages Category, you will also see the Add New button. To add a new page, click this and see the ‘Adding Pages in WordPress SOM’.
Comments
In here you will see comments that people have left on your website, if you’ve allowed them.
Comments in here are visible to everyone visiting your site, unless you hide them. People with a WordPress account can leave comments.
You can see the commenter’s name, email address if left, IP address, comment, what it was in response to and when it was submitted.
If you hover over a comment, you will have options to Approve the comment so it shows up on your site, Reply to the comment, Quick Edit the content of the comment, Edit all the comment, Spam the comment so it doesn’t appear and the user can no longer post on your site, or Bin it.
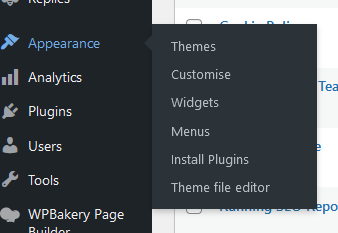
Appearance
In the Appearance category, you will see a few more subcategory options. These are:
- Themes
- Customise
- Widgets
- Menus
- Editor
In Themes, you will see all the uploaded themes you have on your site, and an option to add a theme. To install a theme, see the ‘Adding and Installing a theme to WordPress’ SOM. To view theme details, hover over the image for your theme and click theme details. The theme you are currently using will be the first in the list, and will say ‘Active:
Theme Name’ along with a Customise button. This customise button
will take you to the same place as the customise subcategory button.
The Customise option will take you to what looks like the front end of your website.
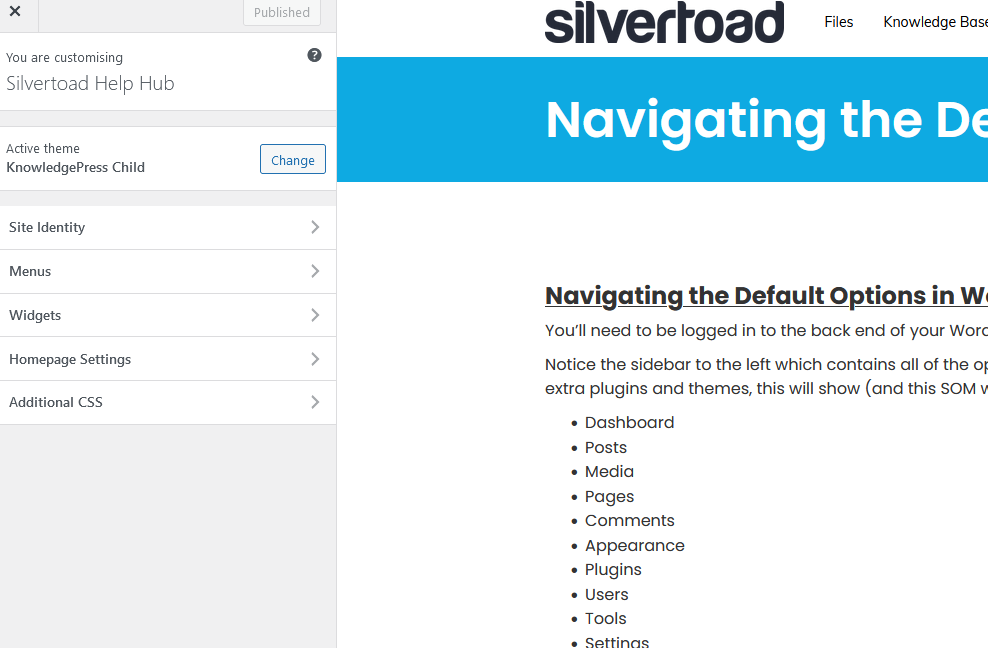
The site identity will allow you to rename the site title, tagline and add a site icon. The Menus option will allow you to change your menus, though this is easier to do in the back end, and the same applies with the Widgets option. The Homepage Settings option will allow you to choose what appears when a user first visits the site, a homepage or a posts page. It can be posts in reverse chronological order (classic blog), or a fixed/static page. To set a static homepage, you first need to create two Pages. One will become the homepage, and the other will be where your posts are displayed. The Additional CSS button allows you to add extra styling to the page. For more information on this, see the ‘Using CSS for WordPress’ SOM.
At the very bottom of the customise bar, you will see three icons – a desktop monitor, a tablet and a phone.
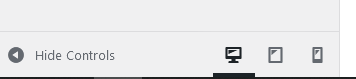
If you click each of these, you will see what the site looks like on the different devices. There may be more options on the customise bar depending on which theme you are using.
In the Widgets subcategory, you can view all the widgets on your website.
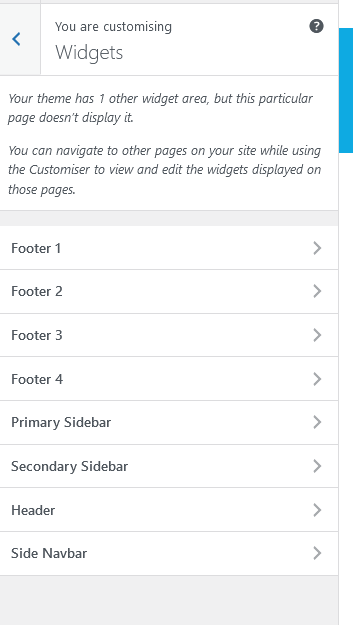
Widgets are small blocks that can perform specific functions. These can be added in sidebars, the footer and anywhere else the theme will allow them. The widgets you can use are listed on the left hand side, and you drag and drop the option you wish to use to a widget area. It will open up the options you have with the widget. Save your options, or if you wish to delete it, click Delete. The most useful ones to use in here are for the footer widget areas, for which you will most likely use the Text options. To view the changes you made on these widget areas, go to the front end of the page and click refresh.
In the Menus subcategory, you can access all the menus for your website. In the first tab (‘Edit Menus’), you can select a menu, and edit it to choose what displays on it, or click ‘create a new menu’ to do so. The main menu will be the one you use most commonly.
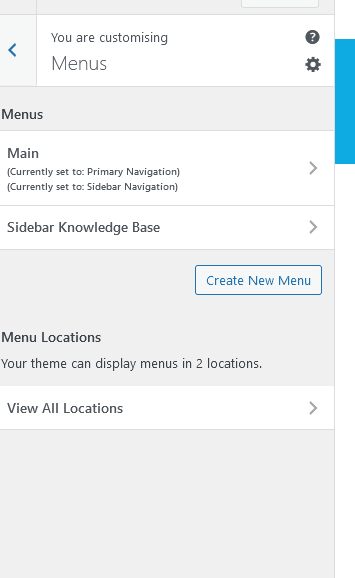
The menu structure is the order of which the menu will appear. The active pages you can directly link to your menu are on the left hand side ready for you to add. In this column is also posts, custom links and categories you can add to the menu. In the Menu settings you can specify where the menu will appear. Once you have completed your menu, click update.
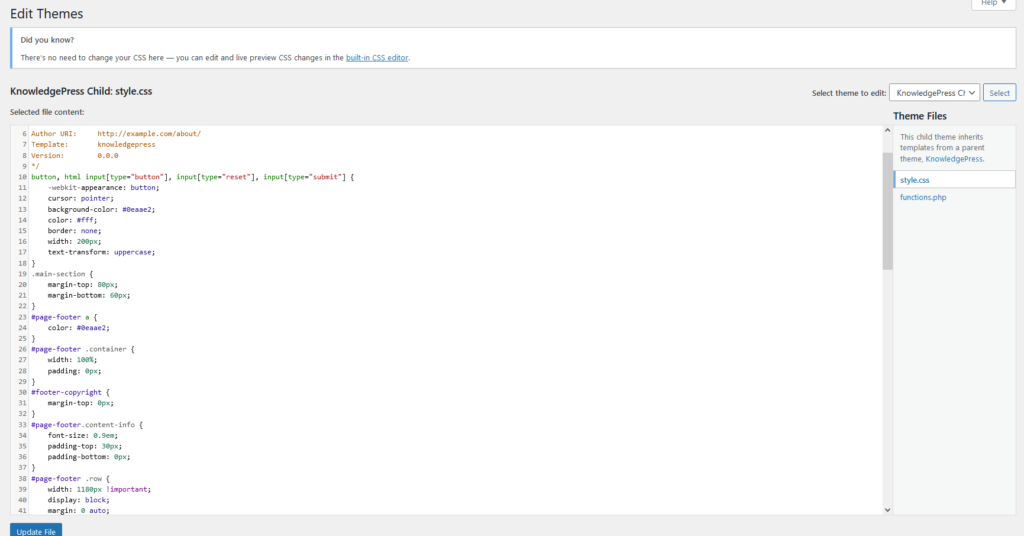
The theme editor subcategory you should refrain from using, as this makes direct edits to your theme, if you do something wrong it could break your site completely. If you are styling properly, you should be using a child theme. For more information on styling, see ‘adding and installing a theme to WordPress’ and use the child theme section. To edit CSS, see the ‘Using CSS for WordPress’ SOM. All in all, don’t use the Editor unless you’re 100% confident in what you’re doing!
Plugins
In the plugins option, you will see all of the plugins installed on your site. A plugin is a piece of software containing functions that can be added to your site, and can extend its functionality. To install a plugin, see the ‘Installing plugins to WordPress’ SOM. You can quickly activate/deactivate, change settings and delete plugins from this page by clicking their buttons.
The Editor subcategory you should refrain from using, as this makes direct edits to your plugin, if you do something wrong it could break your site completely. Don’t use the Editor unless you’re 100% confident in what you’re doing!
Users
The user’s category displays all the users of your website. You can view
their username, real name, email address, role and posts from the initial page.
If you hover over a username, you can view delete and edit details.
If you choose to edit details, you can configure settings. The most important one you will use is the role, as this determines what capabilities the user has.
Administrator – has access to all site back end features
Editor – has access to most post and content features, but cannot activate, install or delete themes nor plugins, cannot create users.
Author –Only has access to their own posts, which they can write, publish and delete. They cannot edit anyone else’s posts.
Contributor – can only read, edit and delete posts
Subscriber – can only view the site.
For a full list of functionalities, read here: http://www.wpbeginner.com/beginners-guide/wordpress-user-roles-and-permissions/?display=wide
At Silvertoad, we set all our users as ADMINISTRATORS unless specified otherwise
In the subcategory, you can add a new user. For more information on this, see the ‘Creating a WordPress user’ SOM.
Tools
Inside the tools category, are tools to perform non-routine management tasks. The first subcategory is Available Tools, which are the ones you already have installed. By default, Categories and Tags Converter is installed.
The Import and Export subcategories are tools that allow WordPress to import and export data to and from content management systems. If you have another website or feed and need to install scripts from there to your new site, use the import tool. The export tool allows users to export WordPress data in XML format which can later be imported into another WordPress installation.
Settings
The settings category is split into several subcategories:
- General
- Writing
- Reading
- Discussion
- Media
- Permalinks
In general, you can edit the basics of your website such as title,
URL, default email, time zone and date.
In Writing, there are the options to change default post options, and posting
via email options.
In Reading, you can change what the homepage displays, max number of blog pages to show, and Search Engine Visibility.
In Discussion settings, you can change the default article settings, comment settings and email settings. You can also change default avatars.
In Media, image sizes are editable.
In Permalinks, you can edit the common and optional settings for permalinks and URLS.

